Once you have figured out where your cuts will go, make a mark on the wall where the factory edge of the first cut tile will be. Stretch your tape measure from that mark and make a mark at each graduation of your layout sheet. Then take your 12" speed square, or a framing square and mark a vertical line at each layout mark. Don't worry that the square doesn't go all the way to the cabinets, a 12 or 16 inch line will be close enough, you should be able to "eyeball" the tile the rest of the way up to the cabinets.
Another consideration I believe I failed to mention was the bottom row of tile. In general, and in particular with the 6x6 tile referenced for this project, you can start with a full tile on the bottom row, against your counter top. This will usually leave a small cut at the top, under the cabinets, which is a good place for the small cut, since it won't be conspicuously out in the open and will be somewhat hidden under the cabinets. If this is something that bothers you, then calculate equal cuts top and bottom, just bear in mind this will produce more waste.
Okay, we're ready to start setting tile, almost. You're going to need something to stick those puppies to the wall. Most tile pros prefer to use a product known as thinset mortar, this is a powder that needs to be mixed with water, or latex admixture. If you choose to use thinset, make sure the thinset you buy is rated to adhere to your particular tile. For example, if you're using porcelain tile (as in this project), buy a thinset which is specified for that use. In general, you want a good quality "polymer modified" thinset.
Another option for this project would be a premixed adhesive known as "mastic". Mastic is a little more user friendly, since it is premixed, and has anti sag properties, meaning your tile won't slip down the wall. Mastic does come with a caveat. It is only suitable for use on walls in non wet locations, and with tile 8" and smaller. Also, since mastic takes longer to dry it can only be used in a very thin layer. Some tile has deep "lugs" on the underside, which may not be suitable for mastic.
Once you have decided on which setting material to use, you will need a notched trowel to apply it. Follow the guidelines on the package as to which notch size to use.
For this project we will be using mastic, and a 1/4" x 3/16" square notched trowel. I prefer a product made by Custom Building Products called T1-60, it can be found at Home Depot.
An inexpensive square notch trowel like the one shown, is all you will need for this project.
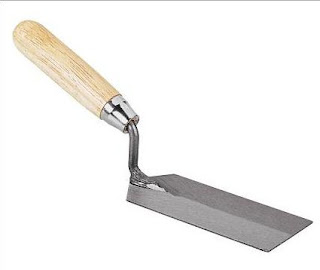
Another handy tool for tile setting is a margin trowel. It has a variety of uses, from scooping, to scraping, to prying, etc.


